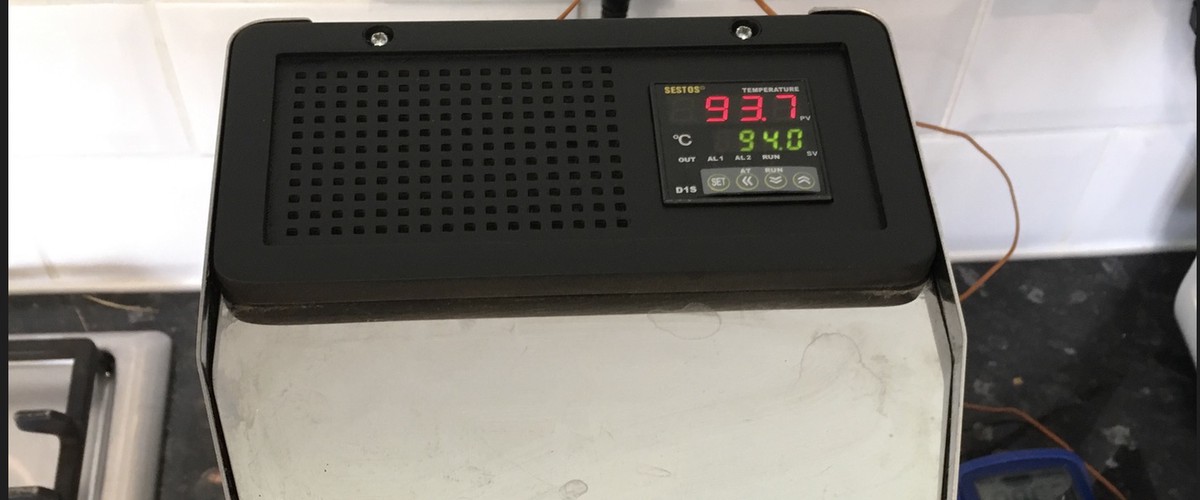
Modifying my Gaggia Classic espresso machine with a PID controller
I’ve owned a Gaggia Classic (pre-2015) coffee machine for about 4 years now. It’s served me rather well, and still produces delicious coffee. Triple shots of 100% crema!
Such shots were only achievable after I modified the machine a bit. I calibrated the pressure valve inside to 9 bar, and swapped the standard porta-filter assembly for a triple-shot bottomless unpressurised model. After struggling with a Delonghi (burr) grinder, I eventually got a Sage (conical burr type) grinder – switching resulted in much more consistently good coffee. Nearly 100% of shots poured are now near-perfect.
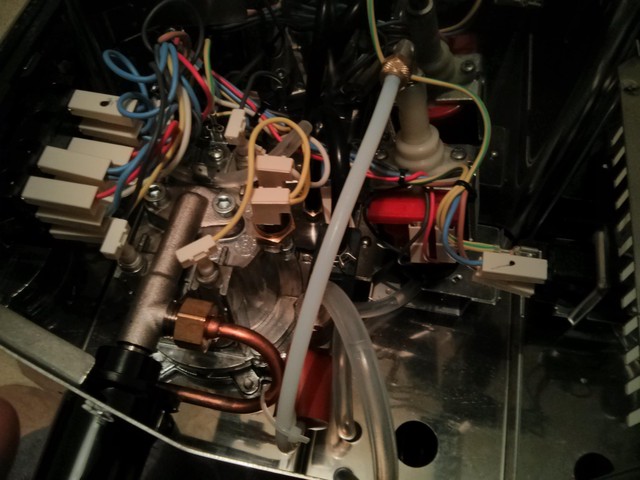
The machine is the land-rover defender of the coffee-machine world. It’s robust, and spare parts are available for everything inside. It’s repairable, which is an unfortunately rare thing in 2019.
Better temperature regulation
One thing lacking with the Classic is good temperature regulation. It uses a simple thermostat, which due to its deliberate hysteresis, the temperature of the water exiting the machine can vary as much as 15 degrees Celsius. As the optimal brewing temperature is 90°C to 96°C depending on taste, this variance means the coffee can be over or under-extracted, or worse – variable.
The solution is PID control via means of an industrial temperature controller; this is a common modification amongst the Gaggia and Rancillio community. I won’t go over what PID control is in this post, but it is useful in this case for tighter and more stable temperature control.
Left over from a previous (DIY sous-vide) project, I happened to have a Sestos D1S-SSR PID controller in my parts bin. It’s a good fit for this job due to the support of many different kinds of sensors and configurability.
Mounting the temperature controller
Most PID projects (and kits) for the Gaggia Classic mount the controller on the side of the machine. I thought this was unsightly and looked mechanically weak so I had a different solution in mind.
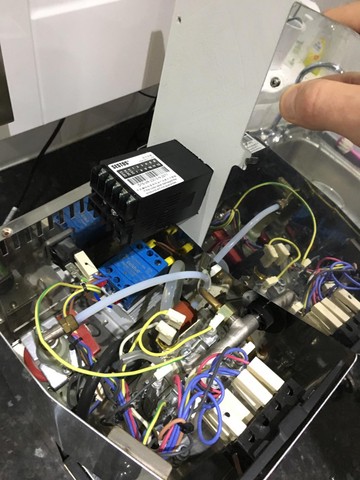
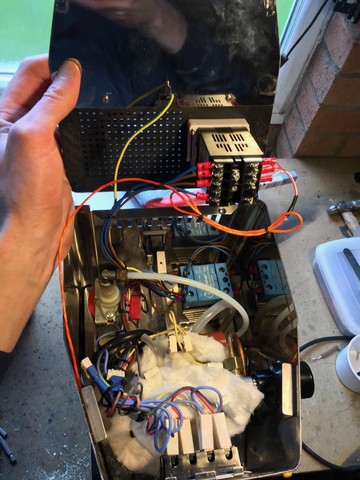
I never use the funnel, which is located underneath the flap on the top and feeds into the tank at the bottom; I always fill the machine from using the tank directly. As it turns out, removing the funnel reveals a lot of free space within the machine – enough space for a solid-state relay with heatsink + the Sestos temperature controller.
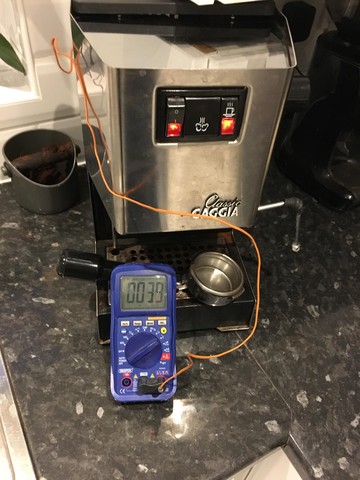
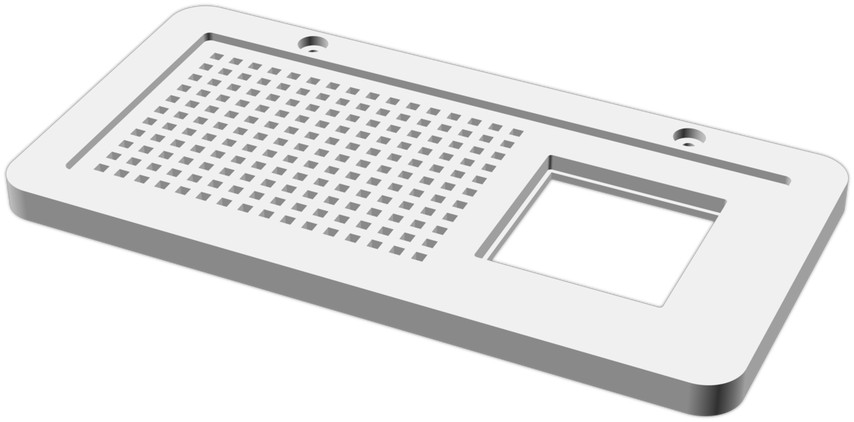
I have a customised 3D printer in my garage (one for another post) so I quickly designed a replacement moulding for the top using a some digital calipers and OpenSCAD. Whilst I created the model, I put a temperature probe inside the machine and left it on. The temperature never exceeded 40c (non-steam mode) which gives me a good margin to the 55c that the Sestos controller is rated for.
Really, I’d like to do a characterisation of the temperature regulation of the original thermostat versus the new solution. It would also help me to tune the new PID controller. Maybe another day – I need a temperature probe with logging support.
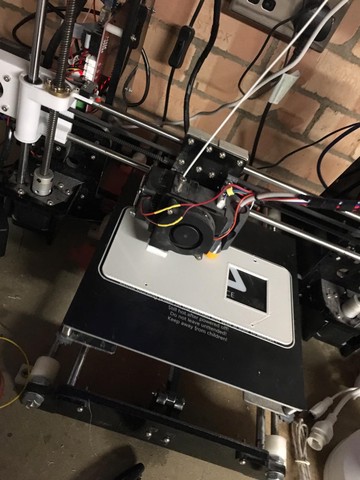
I printed using light grey PrimaValue PLA at 50% infill, using Cura to slice. Light grey isn’t an ideal colour considering I intend to paint it black – but it will suffice.
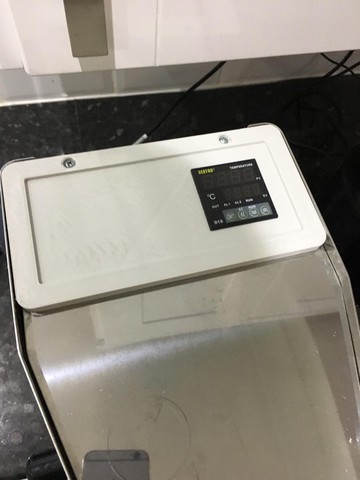
Luckily the first test-fit was a success, aside from some minor filing for the controller opening. I’ll admit the design isn’t great to finish with sandpaper due to the raised edge – but it was a deliberate decision to match the original aesthetic.
From previous projects I know I can achieve a really smooth factory-looking finish. The secret is to put a lot of effort into sanding the design down after optional body filler, then layer spray paint correctly. I didn’t put much effort in but sanded with 120 grit, then 250, 600 and finally 1200. It wasn’t perfect but didn’t have to be.
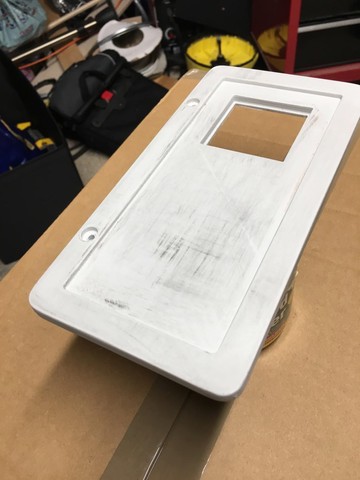
When I finished, the part was smooth and ready for a tack coat of plastic primer. I made 3 coats of primer at 15 minute intervals. I used a fan heater to dry the paint as my garage was about 5c at the time; this is far from ideal for the paint but seems to be fine for primer.
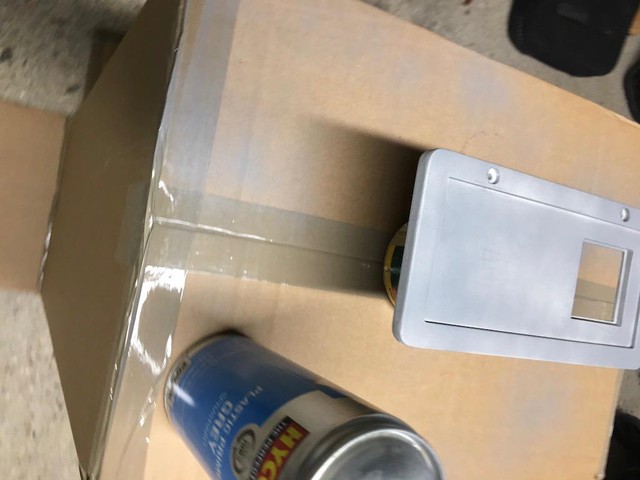
After the primer I made 3 coats of black gloss; which was a mistake as it revealed the imperfections in my quick attempt at finishing the part.
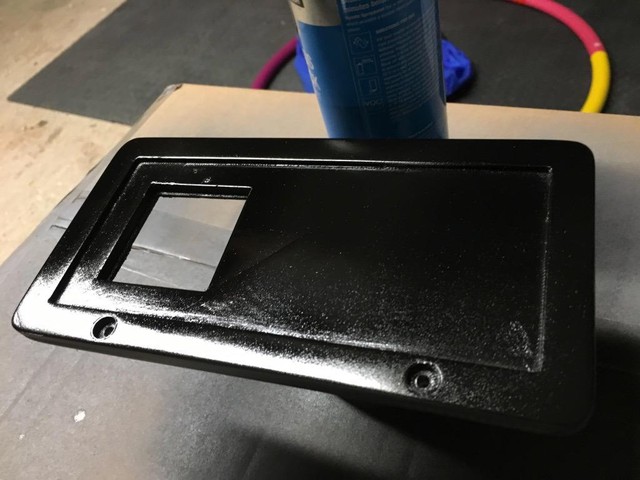
I decided to switch to matte paint. Whilst the gloss paint didn’t seem to be affected by the fan heater, the matte paint clearly dried far to quickly resulting in a weird faux-leather effect:
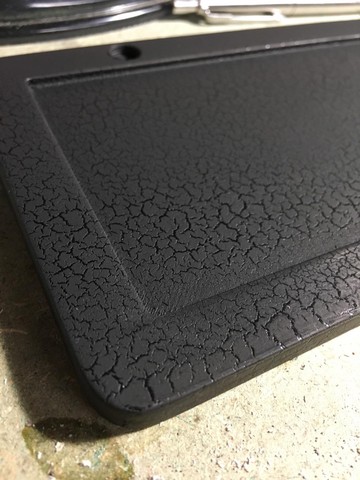
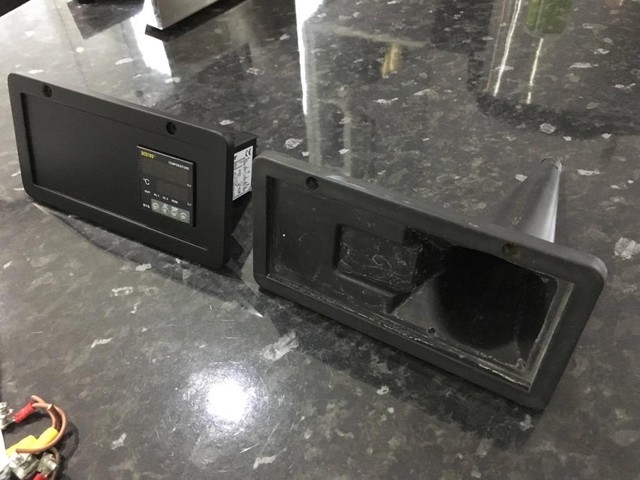
I sanded it away and painted again, this time without the fan heater. The new coating does a admirable job of hiding the imperfections. Here it is next to the original part:
Wiring the controller
To install the PID controller, I had to remove the original brew thermostat. The brew thermostat (rated for 107c) is wired in series with the steam thermostat (145c); this is a fortunate design, as it allows the steam thermostat to act as a fail-safe should the brew thermostat fail closed assuming steam mode isn’t in operation. Should this mitigation fail, there’s still the thermal fuse on the top of the boiler.
As the controller is an SSR type, it outputs a low-current 12v signal intended to drive a solid-state relay. Solid-state relays are not mechanical as the name implies, which means that they can switch at a much higher rate than normal relays as there’s nothing physical to wear out. Faster switching means the PWM period can be smaller resulting in better stability as the output becomes effectively more linear.
Here’s the stock brew thermostat:
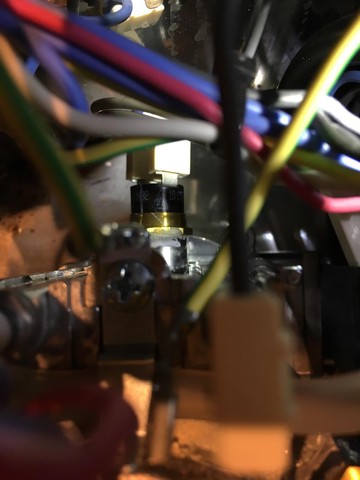
The thermostat screws in via an M3 thread, and connects via standard lugs. I connected my solid-state relay across these connections in place of the thermostat. The relay I used is a 25A rated Celduc unit, complete with heatsink – something I trust more than the FOTEK one that came with the temperature controller. I used male lug terminals and heat-shinked them to the original connections. This meant that the original wiring loom did not need to be modified.
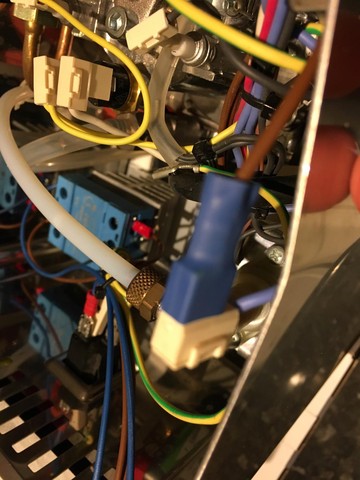
The Sestos PID controller is able to interface with various types of thermal sensor. I found a PT100 sensor (which is a temperature-variable platinum resistor) with an M3 stand-off based coupling from Shadenville on eBay. I recommend this supplier – the temperature sensor loom was high quality.
The seller recommended taking out the boiler to fit the sensor, and warned that it is possible to damage the sensor if you leave the boiler in place. I didn’t want to place wear on the connections by reconnecting everything unnecessarily, so I settled on a compromise; I removed the 4 M4 bolts attaching the boiler to the machine and simply tilted it like below, allowing the sensor to be screwed in (with thermal paste) hand-tight.
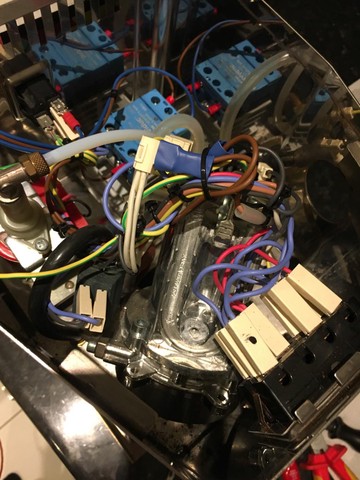
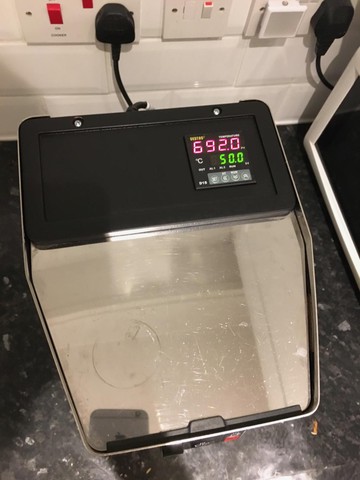
I reassembled the controller and powered it on for a test run. The controller wasn’t yet configured for a PT100 type sensor, so the reading was erroneous as below. I’d the controller across the mains input which meant it was always on – this was a mistake as I’d rather it turn off with the mains switch on the front panel. That, and the PID control loop may go unstable temporarily if the heating element isn’t also on. To rectify this, I connected the live across the controller to the switched live available across the solid-state relay.
It’s worth noting that the colours were misleading – in the UK for house wiring, the blue is neutral and the brown is live. The Gaggia classic had this reversed.
Tuning the controller
After setting the correct thermal sensor type and running auto-tune twice, working temperature regulation was achieved. There were a few issues with tuning though – the autotune overshoots alarmingly, hitting the steam thermostat max level which turns off the output; I bet that confuses the PID autotune algorithm. Not only that, but the rate of cooling vs heating is asymmetrical and has a small time constant so the controller has to react fast – especially when pouring shots. The low time constant is because he boiler is powerful (1.4KW) but relatively small at 300ml. This means that it behaves somewhere between a thermo-block and a traditional boiler.
I used an -8.0c calibration constant for the thermal sensor, as recommended by the eBay seller. This setting is necessary, as the thermowell on the side of the boiler isn’t in a place that can represent the temperature of the water leaving the grouphead well. There is an approximate 8.0c difference – the boiler has to be 102c for 94c water. It would be much better to measure the temperature nearer the bottom, or perhaps use 2 controllers; one for the boiler temperature and one activated when pouring, measuring the water itself.
Due to the position of the sensor, it’s not possible to realise full possible benefit from PID control. However, the temperature is kept much more consistent vs the old thermostat, which means good coffee is more repeatable.
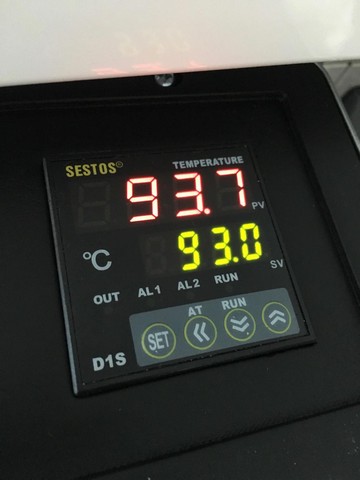
The controller was able to regulate the temperature well with a 0.5 second control period set. This meant that the heater was toggled twice per second. The first shot was a success. Lots of delicious crema!
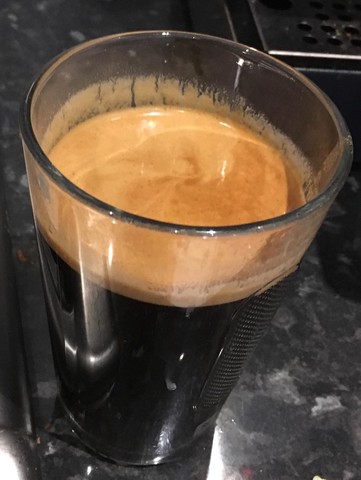
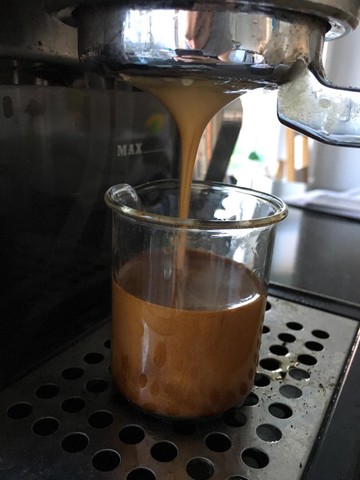
The next week I decided to attempt the auto-tune again. This time it took hours, and failed to work – the temperature was unstable and kept shooting up to 120c or so. I tried again to no avail and thought I’d just got lucky before and ruined my machine for now. I even hit a bug detailed here which meant the control period was set to 70 seconds, probably the result of the instability. I ended up ordering a better Auber PID controller from the US (which the Sestos is essentially a clone of) in an attempt to work around the bug. Whilst waiting, I attempted auto-tune again – this time from cold – it worked great, so the machine was back running. I recommend you tune from cold, as the auto-tune algorithm needs to keep the heater on for a set time (I think) and being cold you won’t hit the steam temperature limit so readily.
Overheating and efficiency
I then realised I’d forgotten to account for the higher temperature within the machine chassis when the boiler is set to steam mode. Surely the 55c maximum of the PID controller would be exceeded. I measured again, and was irritated to see that the steady-state temperature even in brew-mode was 66c – I didn’t wait long enough for the initial 40c measurement. This meant that the controller is outside its operating temperature, so I needed to do something about it. I ordered some ceramic wool insulation which intend to wrap around the boiler – this should improve the efficiency of the machine be reducing heat-loss, as well as allowing the controller to operate cooler.
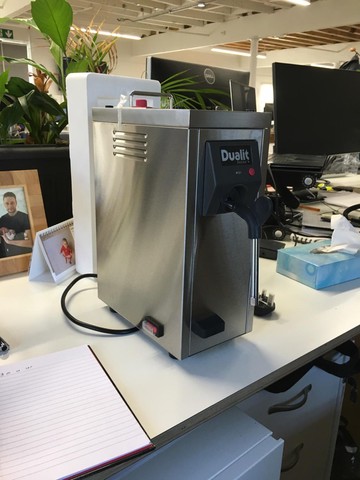
Using the single-boiler classic to steam milk is a pain anyway as the boiler has to be heated to a separate temperature. This means that making a lot of coffees in succession takes forever; I ordered a Dualit Cino to solve this problem. It’s excellent.
Conclusion
My machine now produces better coffee – the bitter taste (which wasn’t overpowering, mind you) is now gone. It also produces more consistent coffee, and it is able to recover between shots better than before. I think. That’s the problem – I don’t know for sure, and I also think that it should be possible to improve the thermal regulation properties of the machine by tuning the controller values by hand.
Doing so requires a more scientific approach – I need to graph the temperate during a shot pull and boiler steady state. This will allow me to quantify overshoot, steady-state error and speed of response. For this I’ll need a way of plotting temperature, probably a computer connected multimeter such as the EEVblog 121GW or any multimeter supported by SigRok.
I also need to address the PID controller overheating.
Update
I was able to reduce the internal temperature of the machine by 5c by adding mineral wool lagging to the boiler. This still wasn’t enough, as the temperature was still 60c – a full 5c more than the maximum permitted temperature of the machine.
Next I added some vent holes to the 3D design, re-printed (this time with black filament) and re-installed. The result was a further 10c drop, which means the internal temperature is around 50c steady-state. Much more acceptable. The results also look great!
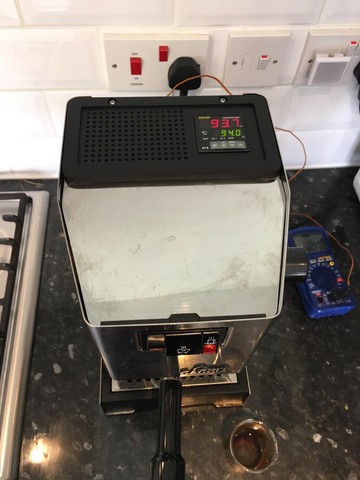
A bit later I improved the thermal lagging by using a zip-tie to secure it and by adding more bits around the boiler. Unfortunately it didn’t seem to affect the temperature.
Appendix
Sestos D1S PID settings
Here are my Sestos PID settings, which might help if you’re replicating this project. Note they’re definitely not optimal but they work – part 2 should improve the settings.
| Key | Value | Meaning | Remark |
|---|---|---|---|
| HIAL | 130 | ||
| LoAL | -1999 | ||
| dHAL | 9999 | ||
| dLAL | 9999 | ||
| dF | 0.3 | ||
| CtrL | 3 | 3 = pid, 2 = autotune | |
| M50 | 196 | Integral component | |
| P | 30 | Proportional component | |
| t | 39 | Derivative component | |
| Ctl | 10 | Control period | Trained with 10, set to 0 for 0.5. |
| Sn | 21 | Sensor type | PT100 |
| dlP | 1 | ||
| dlL | 20 | ||
| dlH | 1000 | ||
| SC | -8.0 | Sensor calibration | In steady state, water leaving grouphead is cooler by this amount |
| oP1 | 0 | ||
| oPl | o | ||
| oPHb | 100 | ||
| alp | 0 | ||
| cf | 2 |
OpenSCAD 3D Model
Model also on thingiverse.
OpenSCAD source:
| |
Updated to include vent
Thanks for reading! If you enjoyed this article or have comments, please consider sharing it on Hacker news, Twitter, Hackaday, Lobste.rs, Reddit and/or LinkedIn.
You can email me with any corrections or feedback.
Tags:
Related: